Shooting a 3D documentary: how we’re syncing Canon 7Ds (VIDEO)

Yesterday’s post has created some confusion between syncing Canon 7Ds for 3D time lapse photography and syncing them for 3D videography.

I’ve edited to make clear yesterday’s post is for stills, and am now posting re. video.

To sync Canon 7Ds while shooting film footage for our first 3D documentary we plan to use the same infrared box systems we’ve rigged to sync our Canon Vixias, and slate our shots so we can sync in post.

I’ve outlined this technique in previous post for Vixias. For 7Ds we:

Set both cameras to self-time/infrared mode, which allows us to use an infrared remote (The Canon RC-5, in this case)

Position our box designed to receive any infrared signal and transmit it through a split cable to two infrared sensors.

Tape the infrared heads at the ends of the split cable to the infrared sensors on the two Canons and then use the remote to start them in sync.

And yes, because of the internal clock circuitry disparities we don’t get a 100 per cent accurate start and stop, as the cameras may not start recording on the same frame.

Our stereographer, Sean White, has found our 7Ds can be out of sync by one or two frames at 30 FPS.

To get around this we’re doing a physical slate at the start of each shot for our editor – this way he can toggle shots by a frame or two and sync from where the slate is.

Sean’s tested this system extensively.

He’s found that once you sync clips at the start they stay in sync for up to 12 minutes straight – much more time than we need to get the types of shots we’re going to capture with the 7Ds.
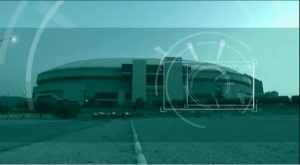
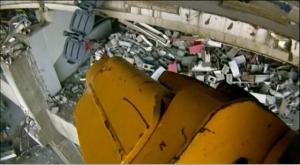
 

Test footage:


VIDEO


Video: Compositing for a 3D documentary – VFX elements that work in stereo

The 3D VFX pyramid fly-in shot that our compositor’s been working on to test techniques for our first 3D documentary is good to go.

Again, you’ll need the good old red-cyan goggles for this:

Our compositor, Jakub Kuczynski, explains elements in the shot:

And compares working on 3D VFX versus 2D VFX:

This shot will be part of the 3D demo I plan to show broadcasters next week.

Now all I need to do is find a 46-inch JVC monitor to show it on …

Shooting a 3D documentary: how we’re syncing Canon 7Ds (STILLS)

I’ve received a few questions re. how we’re syncing Canon 7Ds we’re using to capture elements of our first 3D documentary … so I’m blogging about it to share with everyone.

We’ve used DSLRs to get high res stills at set intervals for time lapses for years, but, of course, never in 3D.

For this 3D episode of Blowdown, the explosive demolition series we produce, the crew will use 7Ds for these time lapses – and also for establishing shots of the condemned sports stadium in Salvador, Brazil and, of course, the implosion itself.

Here’s how we’ve brought this system into the third dimension:

1) Splice cable so there are two heads on one intervalometer.

2) Attach heads to timer remote ports on two Canon 7Ds on side-by-side rig.

3) Sync using the one handheld intervalometer.

Voila!

I’ll provide more details re. our time lapse strategy later: wanted to get this bit up ASAP.

Hope it helps.


Watching a 3D documentary: JVC 3D HD LCD monitors clearly a hot commodity

Supply and demand disparity …

We’re trying to get a 3D monitor so I can show test footage/VFX for our first 3D documentary to broadcasters next week.

I’d like the same monitor that we purchased for our in-house purposes – the the 46-inch JVC GD-463D10 – but guess what … so far there are none to be had.

The Toronto-based supplier that we purchased it from is sold out and backlogged.

They’re trying to get us a monitor directly from JVC – or at least find someone who we can contact to push our order, but neither us nor they have been able to get through to anyone who can speak conclusively on behalf of the company as of yet.

The alternative is pursuing a Hyundai monitor – but we know the JVC works for us, and I’d much rather go with the tried and tested when showing broadcasters a demo of the techniques we’ve developed.

We’re hoping to hear something back tomorrow a.m. (PDT).

A bit nerve-wracking.

But the silver lining’s undeniable … 3D monitors are getting snapped up faster than the assembly line can churn ‘em out.

Clearly this bodes well for entertainment in stereo.

VFX compositing for a 3D documentary: compiling a demo

As we prep to shoot our first 3D documentary, our compositor, Jakub Kuczynski, is getting ready to produce 3D VFX for the show.

We use these photo-real visuals in the explosive demolition series Blowdown, which we’ll be filming the next episode of, mostly for:

1) Locators – help orient the audience and show where the crew is working at a particular point.

2) Disaster scenarios – show the audience what will happen if different aspects demolition plan go wrong.

3) Dynamic structure shots – fly-overs, fly-throughs, fly-ins … allows audience to experience the strength, grandeur and engineering prowess of structures that Controlled Demolition Inc. implodes.

Here are two examples from previous shows: Super Stadium and Spyship:

Locator VFX: RCA Dome. Indianapolis, Indiana

Disaster scenario VFX: Hoyt S. Vandenberg. Key West, Florida

As part of this process, Jakub’s generating sample 3D VFX shots so we can assess them and so I can take some on my trip to meet with broadcasters the week after next.

We’ll combine the 3D VFX clips with some of the 3D test footage we’ve shot so I can give the broadcasters a solid visual idea of what we’ve developed so far.

One of Jakub’s shots – a fly-in to pyramids.

Why I’m including this in the 3D demo:

Look forward to the final.

Shooting a 3D documentary: demolition POV – ContourHD versus GoPro HD

3D POV, here we come. We’ve started looking into cameras to shoot POV footage for our first 3D documentary.

This content is a must – there’s nothing like being able to put a camera where no human dare go and capture the scene from that angle.

For example, what’s it like to ride on an excavator boom while it’s ripping bleachers apart?

An excavator demolishing bleachers, the RCA Dome

This is a screen grab from the demolition of the RCA Dome in Indianapolis, Indiana, the subject of a previous Blowdown show – the explosive demolition series we’ll be filming in 3D.

Now imagine part of the grapple in negative space.

But it’s going to take a bit to get there.

The cameras we use have to be:

1) Lightweight enough to be mounted onto a Magic Arm, or duct taped/fastened to something on the machine.

2) Placed at an interaxial distance small enough to film an object within 1 ½ metres from the lens.

3) Workable with a customized side-by-side rig (that we’re apparently going to build … of course).

4) Capable of turning on in sync.

Our stereographer, Sean White, has narrowed it down to two contenders: the ContourHD 1080p or the GoPro HD.

Suspect the Contours will reign because they’re less boxy, but the GoPro’s a bit better quality – so I’d like to find a way to use if possible.

We’ll see how the “dare to compare” goes.

Shooting a 3D documentary: anaglyphic test footage – 2 Canon 7Ds on a side-by-side rig

As I’ve mentioned, we’re testing several camera systems out to decide what to use to film our first 3D documentary. We’ve seen promising footage out of our A cam system – an Iconix sensor system with Meuser Optik lenses on a side-by-side rig.

Now our stereographer, Sean White, has brought in B roll he shot with our C cam system: two Canon 7D DSLRs on a side-by-side rig.

Happy to say it’s not looking bad either.

Need a pair of the old school anaglyphic glasses for this one:

There’s only one problem: some of the backgrounds are diverging past our broadcasters’ specs.

So now we’ll have to experiment with different interaxials until we fix the issue.

In the field – the demo of a condemned sports stadium in Salvador, Brazil for the explosive demolition series Blowdown – this system will be used to capture establishing shots of the structure and, of course, its implosion.

Here’s an earlier video of Sean, walking though the setup.

We’re also honing how to capture our time lapses with this system – details to come.

Editing a 3D documentary: how to burn 3D HD footage using Final Cut Pro

Our editor, Brian Mann, has found a way to burn up to 20 minutes of 3D HD footage that will play in a Blu-ray player … without a Blu-ray recorder.

He discovered the work-around after I asked him to compile some test material we’ve shot/composited so I can show it to the broadcasters we’re delivering our first 3D documentary to.

Here’s how:

1) Put a standard-issue DVD into burner.

2) In Final Cut Pro, choose File, then Share.

3) Choose Blue-ray, then Export.

4) Wait for it to finish, and voila. The DVD thinks it’s a Blu Ray disk.

I plan to show the DVD (a montage of 3D footage and 3D VFX) during a meeting with broadcasters so they can see the visual style we’re developing.

Playing the file off of a laptop’s the alternative, but could prove problematic for several reasons:

1)Laptop would have to be powerful enough to play the files.

2)The file could crash or not play back properly.

3)Cumbersome extras – like a DVI to HDMI cable – would be required.

With a DVD, we can set up a JVC 3D HD monitor and a Blu-ray player, then play the DVD knowing it will work.

Sure, it will only burn 20 minutes – but that’s more than enough for my presentation purposes. Easy to play 3D content in a boardroom setting.

Of note: Brian’s encoding side by side so that the footage will display on the monitor properly – no dual stream. Not something we want to forget.

That, and plenty of backup copies.