So You Want To Learn 3D? How to bring the stereoscopic dream to life

It’s been a long journey into the realm of 3D documentary filmmaking for myself and the rest of the Parallax team.

A rugged path marked with a few big wins – triumphs earned via epic missions through a series of formidable stereoscopic obstacles.

The good news: we’ve trampled a rough trail … a trail that will hopefully help other enthusiasts avoid getting too thoroughly lost in the enchanted forest that is 3D production.

Our stereographer, Sean White, details some quick and dirty ways to follow us into the third dimension.

Immerse yourself

Learning 3D is a full-time job. A solid foundation of stereo principles is needed if you want to succeed

Research. Take an introductory course. Enlist the help of an experienced stereographer.

Or for true 3D keeners, deconstruct a ready-made system into its basic components. Best way to master the beast. Hands down.

Start small

Our first foray into 3D filmmaking was a modest one involving two $20 cameras purchased on EBay and mounted on a side-by-side rig.

Starting small makes getting bigger the only option.

Experiment

Always think of ways to make your 3D system better. Tinker, take risks, and invent.

Capitalize fully on your mistakes by knowing exactly where you went wrong. Leave no error unturned.

Share your failures and successes with other experimenters. Best way to avoid epic catastrophes.

Keep your eye on the prize

Driving your whole 3D pursuit is the desire for results – not only should you want something properly stereographed but something beautifully stereographed.

Keeping this in mind, never forget to reverse calculate . . . knowing what you want in the end means taking purposeful, well-thought steps to get there.

Alright, that about does it … now it’s time for the good stuff:

Get out there, get dirty, and above all, have fun.

Ian Herring, President

@ianherring

File 177

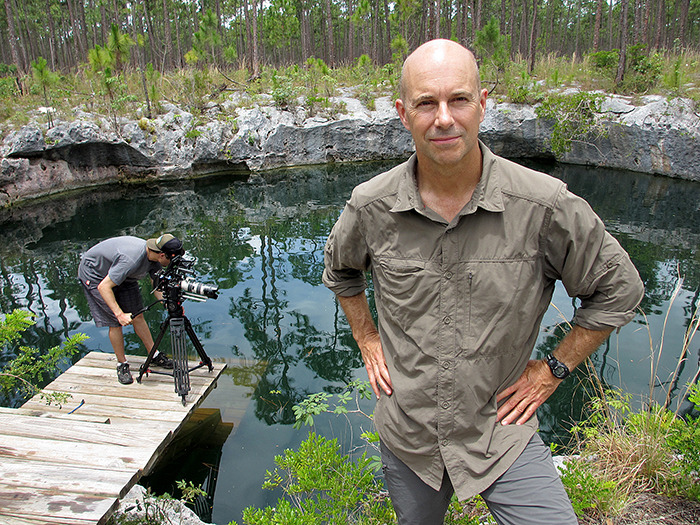
Stereographer Sean White films Battle Castle: Dover.

Click here for more photos of the Beamer EX and Parallax crew in action.

Shooting a 3D Documentary: Sony EX3s on Custom Designed Rig Get The Job Done

Production of Battle Castle is fast underway. It’s a documentary series that brings the world’s greatest medieval strongholds to life and we’ve kicked it off shooting 3D in Kent England, on the grounds of the magnificent Dover Castle.

Packing wisdom gathered from taking Blowdown 3D from production through post, we’ve optimized our beam-splitter rig for this new terrain to avoid the issues (and limitations) we had to work with during our first journey into the third dimension.

The result: one self-contained system that can capture almost everything we need.

Here’s the breakdown:

We’ve chosen to mount 2 Sony EX3s over the Canon 7Ds to avoid genlock issues we were experiencing with the Canons.

The EX3s are great, gold standard cameras and can output a clean signal straight to our Nano3D drives.

We’ve also reconfigured the sliders for more interaxial play and attached customized attachments so we can vertically hang cameras without ripping out the hot shoe mount.

We used red-rock micro components along with some custom parts to fine-tune the hand-held splitter.

Altogether it weighs 45 lbs meaning a strong DoP can hold it for 4-5 minutes before taking a break.

Well worth the effort when it means you have freedom.

Limitation worth noting – the EX3s can’t capture vista shots where the subject is faraway. We fill this gap by using a pair of Canon 5Ds on a side-by-side rig to capture these types of shots.

So what it comes down to is we now have a system with perfect sync, beautiful capture, flexibility, and portability.

What more could you ask for?

Ian Herring, President

@ianherring

Shooting a 3D Documentary: Arming our B-cam system for Blowdown

In the previous post I described the evolution of our mini beam splitter rig, engineered by the Parallax crew for portability and 3D close-ups.

Before the filming of our first documentary, Blowdown, we went back-and-forth on what cameras to mount on this custom-designed rig to complete our B cam system. It was an epic battle that ended with Canon 7Ds as victor … for this round at least.

Here’s why:

When we shot the demolition of the Fonte Nova Stadium, our Iconix A cam system rigged side-by-side, also with our very own hand-held design, took some beautiful shots.

For our B cam system, it down to Sony EX3s or Canon 7D’s. The big problem is the Sony EX3s proved too heavy and cumbersome for our purposes. This is an event-based documentary in a demolition zone – last thing we need is to haul excess weight around.

So the 7Ds were the cameras that we went with – but we knew this decision came with a couple drawbacks:

1. The 7Ds have genlock issues making it difficult to synchronize the captures between the two cameras. Meaning we’re going to have a long gop compression issue.

Translation: fast motion close to the camera will produce retinal rivalry.

2. We can’t use video feeds coming out of the cameras with our Transvideo 3D monitor.

Which means we won’t be able to overlap images and check alignment during the shoot.

3. There’s no uncompressed signal coming out that we can tap into and record to the nano3D drives – a problem in 2D as well.

Despite these limitations, we still captured great stereo images with properly set interaxials.

In the end, our confidence in our Canon 7D mini beam splitter system paid off and we have a visually-unprecedented documentary to show for it.

But as we move further into the third dimension, we’re upping our game …

Ian Herring, President

@ianherring

Shooting a 3D Documentary: How to customize your 3D gear to get the best shot

Industriousness, adaptability, and innovation are vital when it comes to the world of filmmaking – especially when you’re shooting one of the first event-based 3D documentaries ever produced for an international audience.

Before we filmed Blowdown 3D, our stereographer, Sean White, faced a huge challenge: engineer a 3D rig that could capture the variety of shots we needed and stand up to run-and-gun filmmaking on an industrial demolition site.

We decided on a beam-spitter rig because a side-by-side rig wouldn’t have allowed us to shoot the close-ups we wanted.

But there was a problem: the Film Factory Indie beam splitter rig we had purchased would have been a beast to lug around a condemned sports stadium in Salvador, Brazil.

Necessity is the mother of invention after all … if we were going to make this journey into the third dimension work, it was clear that we’d have to come up with our own rigging system.

First step: tear open our Indie Film Factory beam splitter, get to know its insides, and build it stronger.

It was a process of experimentation, ordering parts, making adjustments and modifications.

Customize, customize, customize.

Finally, we created a design that worked and hired a machinist to solder the pieces together.

The result: an aluminum box with a window for a horizontal camera and an underslung design shooting up at a mirror.

We call it the mini beam splitter rig.

Besides being close-up capable, this custom design also makes for less problems with reflection and helps protect the mirror and camera lenses from the rain, dust, etc. sometimes encountered in the field.

Above all else is its portability, which is paramount when you’re filming an event-based documentary.

All this at a fraction of what manufacturers are asking for this kind of optimized technology.

Ian Herring, President

@ianherring

Editing a 3D Documentary: Landing a Colorist

After some investigation, our team and I have finally found a studio to take on the epic task of colour grading our first 3D documentary.

The search was a tough one.

The main challenge: though many studios in the Vancouver area possess the colour correcting software to edit 3D – DaVince Resolve, Lustre, Quantel Pablo – they’re still waiting on the monitoring systems to edit in stereo.

For some studios, monitoring systems were actually in transit, boxed to be at their doorstop in less than a month … exciting evidence of the growing hunger for 3D content.

Our colorist will have their work cut out for them.

The rigours of event-based 2D documentary filmmaking versus intentionally lighted film environments means the colorist will have to deal with variable lighting that can change from one shot to the next.

Tackling discrepancies between 3D footage will be another challenge.

The way the cameras capture, miniscule differences in manufactured parts, and the way light hits these parts creates differences between left and right.

The differences are slight, but if left uncorrected could produce a big problem.

Matching stereo pairs and making content broadcast legal will take the work of an expert, but it’s worth the payoff: the absolute best of what 3D can offer before it leaves our hands.

Ian Herring, President

@ianherring


Editing a 3D Documentary: Scouting for Colorists

As we enter the polishing stages on our first 3D documentary, the hunt is on to find a studio that can take on the task of color correcting months of painstaking work.

It’s essential to any post-production process, but especially crucial to 3D because we’re creating an effect that only reads if stereo pairs match perfectly.

When filming, aberrations in stereo images occur because the mirrors/prisms contained within the beam splitter can change the nature of the light from one moment to the next.

Any slight difference in temperature or exposure of image pairs will confuse the brain, create discomfort, and botch the whole operation. Period.

So my team and I need to be choosy when it comes to colorists. The challenge now is finding a studio that has a system capable of stereo viewing and correction – slim pickings due to 3D’s relative newness.

And of course, one that possesses the expertise to produce the high-quality 3D imaging we are looking for at a price we can work with.

More to come …

Ian Herring, President

@ianherring

Compositing a 3D documentary: How to maximize stereoscopic effects

Now that our first 3D documentary is almost completed, compositor Jakub Kuczynski has time to give the lowdown on some of the challenges he faced editing Blowdown.

Challenge 1: Double-rendering

Because 3D is filmed in stereo pairs rendering for each eye is required. For a compositor with tight deadlines this process can be a painful one.

Challenge 2: Editing in anaglyph

3D compositing in anaglyph can be deceiving because it crushes depth perception.

The tendency is to compensate for this by creating more depth, but sometimes you can overshoot the mark – a discrepancy that becomes obvious when you view the footage on polarized monitors.

An extra step is then needed to make sure sure stereo pairs are aligning perfectly which, of course, means more time and inevitably more stress.

Challenge 3: Finding the happy balance between formats

Until that fine day when everyone is experiencing our documentaries in full stereoscopic glory it’s important to make sure shots work just as well in 2D as they would in 3D. That in itself is an art.

Here’s an example of one of Jakub’s most technically challenging shots – a 3D within 3D effect composited for Blowdown’s episode on the implosion of the Fonte Nova Stadium in Brazil:

  And here’s how he brought it all to life:

But, of course, mastering challenges like these come with the rewards of creating 3D VFX everyone can get a kick out of.

Ian Herring, President

@ianherring

Editing a 3D Documentary: Review of Panasonic’s 25” BT-3DL 2550

If you want to create a high-quality 3D program, having the best-of-the-best in production equipment is a must – that and a great crew, of course.

So while we’ve been in post-production for our first 3D documentary, our editor Brian Mann and I have been on the hunt for a picture-perfect 3D monitor to QC our cuts.

The latest contender: Panasonic’s 25” BT-3DL 2550, a passive circular-polarized monitor with dual processors.

The Panasonic comes with all the bells and whistles any 3D editor could ask for: pro-connectors, 10 bit 3D LUT for great color accuracy, 3 stereo viewing options including simultaneous, line-by-line, and side-by-side.

But when we brought it in to try it out we ran into an unexpected problem –  the display’s polarizing filter wouldn’t work properly with our RealD glasses. The colour was off – pink tinges galore.

Funny thing was when we turned our 3D glasses sideways it seemed to work. Hmmmm.

We’re not sure whether it’s a proprietary or technology issue. The Panasonic tech support team wasn’t sure either.

So in the end, we chose to send the Panasonic back.

We weren’t up to buying another set of 3D glasses on top of the ones we already had. Panasonic charges $100 per set which, along with the pricier monitor—Panasonic $10 000 vs. JVC $6 600 —is a bit hard to swallow.

We’ll nail down a dual stream monitor soon enough. It’s just going to take a little more digging.

Ian Herring, President

@ianherring

Compositing a 3D documentary: converting 2D to 3D

Even though we’re going to shoot our first 3D documentary entirely in the third dimension, our visual effects will still be generated from stills.

Our compositor, Jakub Kuczynski, has been converting 2D VFX from previous episodes of the explosive demolition series Blowdown as he preps to work with photos from the implosion of the Fonte Nova Stadium in Salvador, Brazil.

He’s working in 3D space in Adobe After Effects. So to convert shots, he:

1) Generates a second camera in the 3D space, so there’s a camera for the left eye and the right eye.

2) Positions the second camera being aware of the same elements as shooting on location: how close objects are to the camera, etc.

3) Goes thorough the shot, key frame convergence depending on where the camera is in relation to objects.

4) Creatively decides where the depth cues will work best.

5) Renders both eyes.

6) Hand over to edit, then check the shot out on our polarized monitor.

Go through the shot, key frame convergence, spit out a left eye and a right eye.

It’s great to see some of the shots of 2D past converted into 3D – prominent, big and impressive.

Here’s the anaglyphic version of one of the shots, a bunker fly-in from Spyship: sinking the Hoyt S. Vandenberg – now the second-largest artificial reef in the world – off the coast of Florida.

Making a 3D documentary: stunning visuals, solid story

It’s the final countdown. Our stereographer, Sean White, is hustling to nail down all the gear to shoot  our first 3D documentary.

The crew will be packing up on Sunday, and flying to Salvador, Brazil on Monday to start filming the explosive demolition series Blowdown – plan to get get lots of pics and video of the gear before they leave and post here next week.

I’ll be joining them the week after, and will stay until after the implosion of the condemned Fonte Nova Stadium.

And while Sean and the others are busy thinking about how to capture great visuals in 3D, I’m going to be thinking about story.

Even though all this 3D stuff looks incredible, I still believe that if the story isn’t good, it’s not worth watching – so I need to make sure we’re investing in it first.

This means capturing key bits between Controlled Demolition Inc.’s crew – obstacles they encounter, conversations they have, and emotional moments that resonate.

On the other hand, I don’t want to be afraid to capture 3D footage that will captivate our audience visually …